How to: Microplastic
An amazing attention-grabber – with this simple exhibit, kids can spend hours and hours digging out tiny fragments of torn plastic straw with a pair of tweezers from a pile of dirt. This exhibition guideline explains how to set up and introduce microplastics to the public.
|
|
Theory
Plastics are essential to modern life, but we dispose of them too readily, dumping them in landfill sites, releasing them into the wild, and flushing them down our drains. Many pieces of plastic enter the environment, where they cause harm and eventually break down into very, very small pieces, including microplastics.
Set up
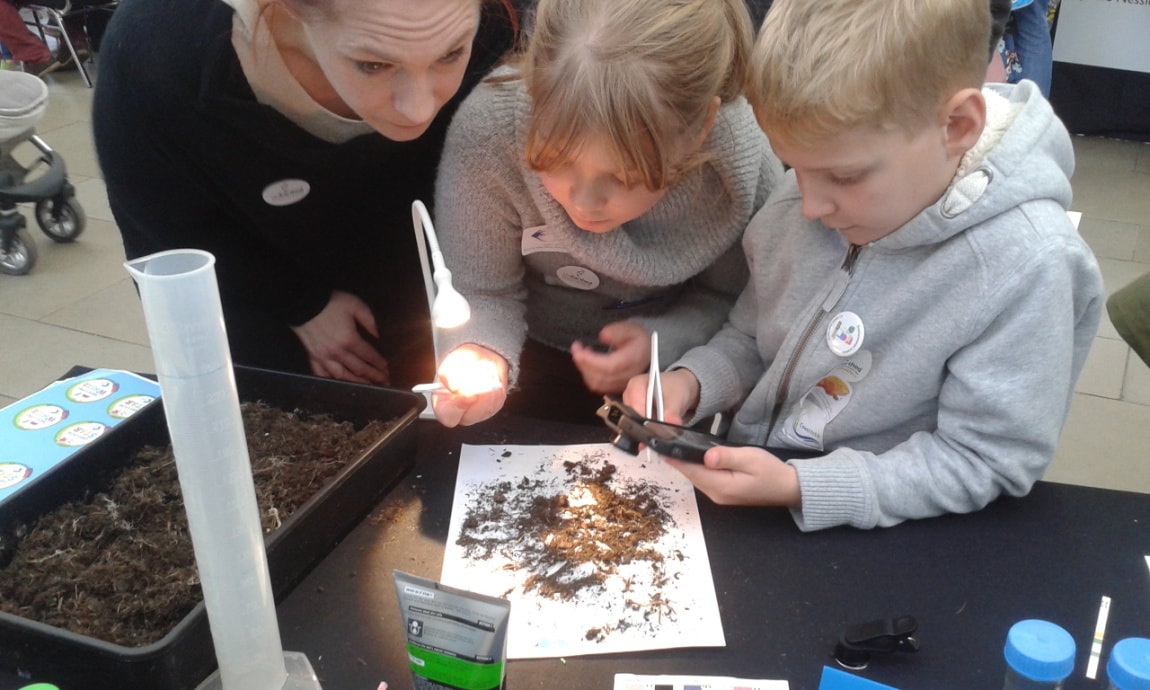
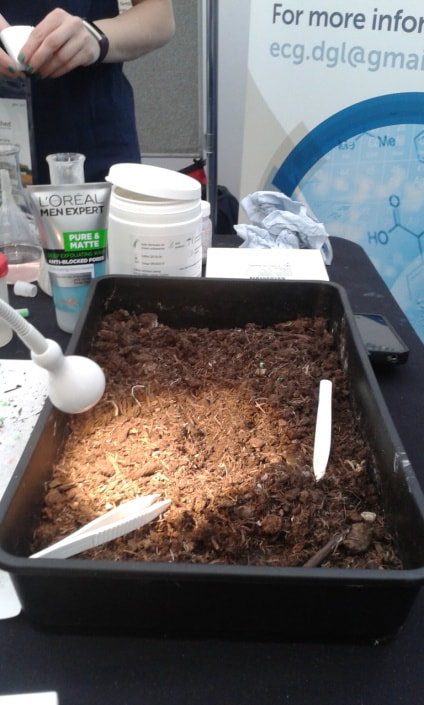
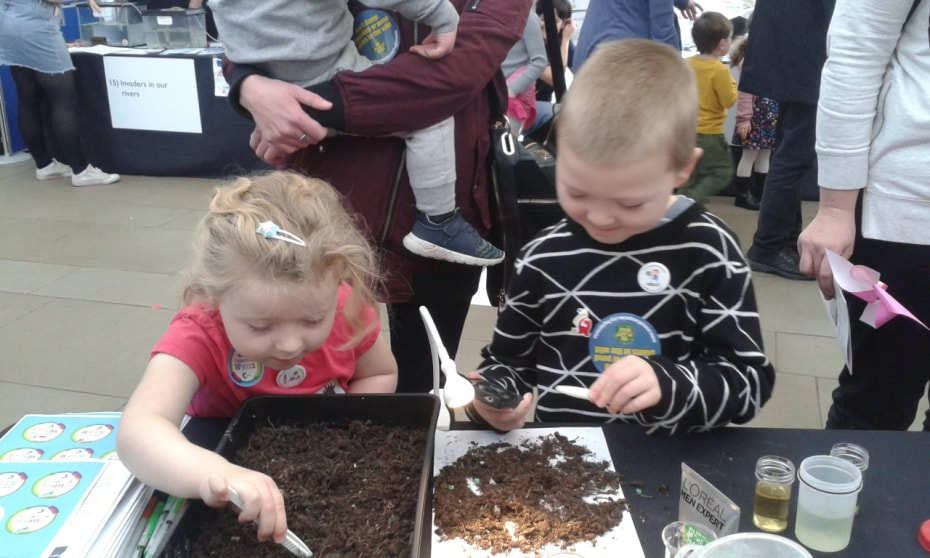
Fill an A4 sized tray with dry earth or soil, chop or grate 2 or 3 coloured straws as small as possible and distribute the pieces through the soil. A bendable desk light and phone-attachable microscope make great technical additions if you have a power source or battery light. We also had a facewash containing microplastic beads for visitors to look at and touch.
Challenge
Find the plastic contaminants!
Exhibition Cost
About £40 (excluding phone), but all components except straws will be reusable; costs are mainly for the “extras”, especially the clip-on microscopes (£20 for 3) and desk lamp (about £10).
Exhibition weight
Less than 5kg
Exhibition size
Would fit into a printer paper box
Resources required
Electrical power for the desk lamp
Things to look out for
After a few enthusiastic visitors, this exhibit will need resetting. Ensure the soil used is dry as there will be mess because some children find it hard to distinguish soil debris from plastic. Lying a piece of paper beside the tray allows them to collect plastics and examine them through the microscope. Also beware that you might get several children round the exhibit, so provide at least four pairs of plastic tweezers and place it, if possible, on a small table or corner of a larger table to give them more space to get round. Larger and heavier trays will be more stable, especially on tables with other exhibits!
Plastics are essential to modern life, but we dispose of them too readily, dumping them in landfill sites, releasing them into the wild, and flushing them down our drains. Many pieces of plastic enter the environment, where they cause harm and eventually break down into very, very small pieces, including microplastics.
Set up
Fill an A4 sized tray with dry earth or soil, chop or grate 2 or 3 coloured straws as small as possible and distribute the pieces through the soil. A bendable desk light and phone-attachable microscope make great technical additions if you have a power source or battery light. We also had a facewash containing microplastic beads for visitors to look at and touch.
Challenge
Find the plastic contaminants!
Exhibition Cost
About £40 (excluding phone), but all components except straws will be reusable; costs are mainly for the “extras”, especially the clip-on microscopes (£20 for 3) and desk lamp (about £10).
Exhibition weight
Less than 5kg
Exhibition size
Would fit into a printer paper box
Resources required
Electrical power for the desk lamp
Things to look out for
After a few enthusiastic visitors, this exhibit will need resetting. Ensure the soil used is dry as there will be mess because some children find it hard to distinguish soil debris from plastic. Lying a piece of paper beside the tray allows them to collect plastics and examine them through the microscope. Also beware that you might get several children round the exhibit, so provide at least four pairs of plastic tweezers and place it, if possible, on a small table or corner of a larger table to give them more space to get round. Larger and heavier trays will be more stable, especially on tables with other exhibits!
Download a copy of this "how to" document here
|
| ||||